|
|
 The wing pivot bracket holes looked like they were punched rather than drilled. When new there was significant play in the mechanism. They became much worse after 200+ hours of shaking. Other than clearance as a problem, it is not good to have steel sliding on steel. Moisture creates iron oxide and this soft abrasive slowly chews up the pin and enlarges the hole.
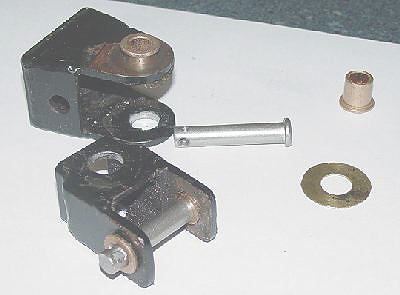
Oilite flange bearings with a 5/16th inch ID and 7/16 inch OD were purchased from McMaster Carr. Using a new drill all 5/16 ID holes in the brackets were re-drilled. A better approach would be to drill 1/64 of an inch smaller and then to ream out to 7/16 of an inch. By increasing the hole ID from 5/16 to 7/16 of an inch, joint bearing surface improves by 40%. A second advantage is that the pins no longer carry direct load so there is no wear between the pin and the bearing material. The pins just hold everything in place. |
|
 The bearings that passed through two thicknesses were not cut to length to save weight. The non-flange OD end was chamfered to make it easier to insert the bearings. The bearings next to the wing attachment point were trimmed a little longer than the steel thickness.
To take out the up and down play, round thick brass shim washers were placed in-between the pivot clevis on the cage and the link to the wing. |
|
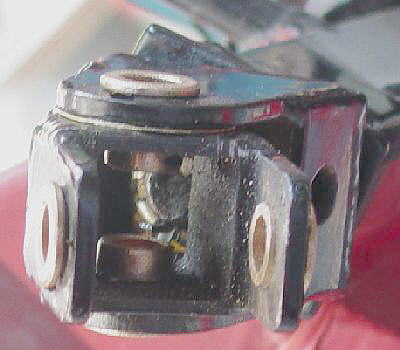
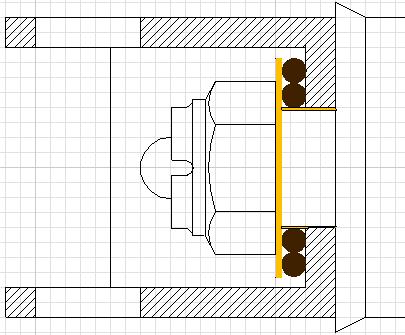 I did not take any photos of how I removed play from around the cage stud. First I cut strips of various shim thicknesses and coiled them inside the clevis hole. If I could slide them onto the stud, I increased the shim thickness until I found a snug fit. Then this shim was coiled around the stud up next to the vertical surface and a piece of woven fish line was double wrapped around the outside to keep the shim in place. With one hand holding the fish line taunt, the cage clevis was slipped into place.
Then a square washer was made from thick brass shim stock. Two neoprene "O" rings were glued to the backside of the washer. Grease was applied to the "O" rings and this assembly was slid into place. Then the original nut was threaded onto the stud and snugged down to compress the "O" rings. |
|
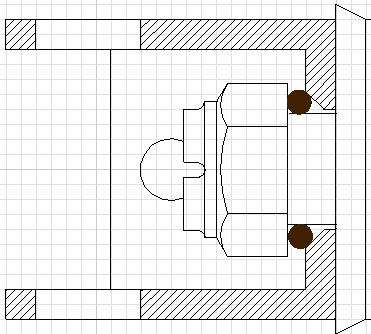
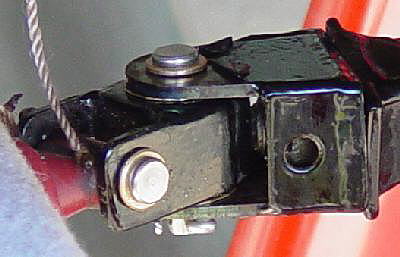 Another view of the final assembly. There is no play in the swivel linkage assembly. Since making this modification, I have had to adjust roll trim. I may pull the vertical pin and move the shims around to from top to bottom to see if I can get by with less trim. Also, the FireFly is much quieter on taxi out and in.
|
|
 If I had it to do over again, I would try this approach on the cage pivot stud. It is a little simpler and should work just as well.
|