|
|
 After 244 hours, the left wing middle piano hinge pin was showing wear, and the inboard hinge pin needed to be replaced for the second time.
|
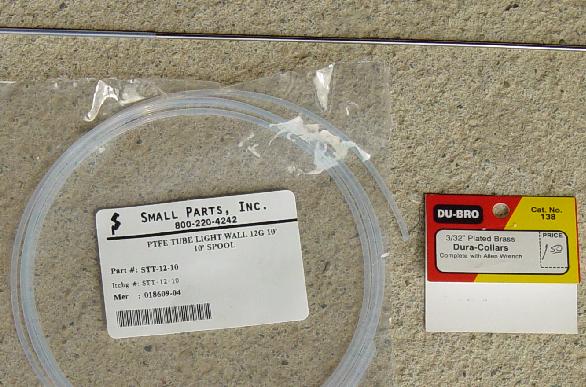 Rather than replace the worn pin with a new one, I elected to try a Teflon sleeve over a smaller pin in hopes that the aluminum oxide would not grind the Teflon away. The Teflon tubing, part # STT-12-10 was ordered from Small Parts, Inc. 3/32 inch ID collars can be found at most hobby shops. And the rod is from McMaster-Carr., part number 8888K13 - (A2 Tool Steel Tight-Tolerance Rod 5/64" Diameter, 3' Length)
|
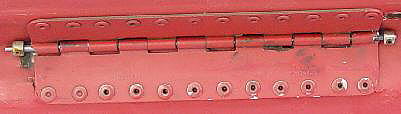 The control stick was tied to the left side to raise the aileron and expose the hinge. The crunched hinge end was filed away so that the worn pin could be driven out with the new smaller diameter replacement pin. Then a piece of Teflon tubing was pushed over the new pin and a little lubricant was smeared on the Teflon. Then the new pin with Teflon tubing was inserted into the end hinge hole. With very light pressure the combination was pressed further until it struck the misaligned hole in the opposite hinge. Then by jiggling the assembly and a little pressure on the new pin assembly it passed into the next hinge segment. This process was repeated until the pin and tube passed through to the opposite side of the hinge. And finally, collars were slid over the hinge pin ends and the set screws tightened to hold the pin in place.
One cannot make the hinge rattle with this arrangement. Total cost to replace all aileron hinge pins is about ten dollars. Will it hold up? Only time will tell. |
 With the hinge pins repaired, clearance between the aileron crank pivot bolt and hole was addressed. I made a brass sleeve from 11/32 inch OD / 5/16 inch ID tubing. I cut a piece about one-half inch long and using a fine file trued up the cut end so that if parallel to the finished end. Next on one end I filed a taper removing material from the OD toward the ID. This sleeve was slid over the bolt with the taper towards the pivot hole. Then a nut was threaded onto the bolt and slowly tightened as the aileron bolt was centered and the tapered end of the sleeve entered the hole. The nut was tightened until all play was removed. The thin wall brass tubing was made by K&S Engineering, and can be purchased at most hobby shops. To save a little weight a modified Nyloc nut was used.
What is nice about this scheme, is that as the tapered sleeve wears, one can tighten the nut and remove the play again and again with little effort. At this point I thought that I had solved all the problems with the left aileron. But when I gave the aileron a shake I heard a rattling noise. The rod end bearings on the ends of the left aileron push-pull tube are worn and so they need to be replaced too. |