|
|
 A view from the rear looking forward into the inside of the muffler loop. Clear tubing was used so that one can see if coolant is present in the system without removing the filler cap. The hose from the head to the small expansion tank is a reinforced spray hose for a kitchen sink. The other small tube that comes out from under the filler cap is thin Tygon tubing that goes down to the coolant recovery bottle.
|
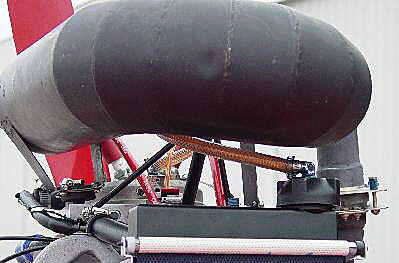 This is the view from standing by the cockpit looking back over the wing. One can see that there is coolant present. As long as there is any coolant showing in the burp lines there is sufficient coolant in the system.
There is a restricter in the line from the expansion chamber to the upper radiator tank to prevent significant coolant flow. This and the air passing under the muffler prevent the tubing from excessive heat. |
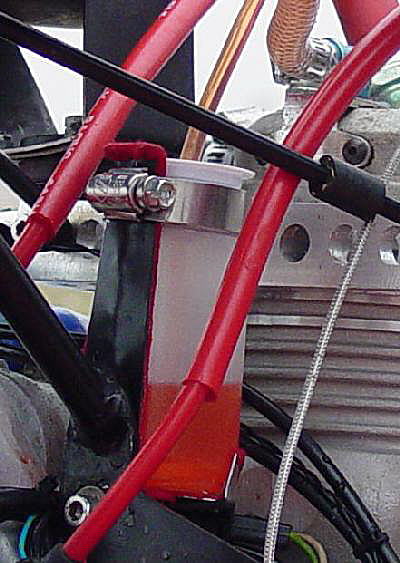 This is the coolant recovery bottle. It is placed in a holder that is lined with flannel to prevent chaffing. The hose clamp will be safetied. It was a challenge to make a small system that would not spew coolant out all over the engine. The solution was a Rubbermaid four ounce condiment bottle, and an inverted cone made from aluminum house flashing that prevents the fluid from sloshing up out through the cap holes. The cone is placed under the upper lip of the bottle and the edge is sealed against the inside diameter of the bottle with JBWeld. The peak of the cone is removed so that the supply/return tube can pass through to the bottle bottom.
The hose clamp needs to be safetied. |
|
After about 30 hours of use, I discovered a small bubble appeared in the hose just before the expansion chamber. And then as flight time passed on by the bubble became larger. Since I had previously over heated the engine and I had not trued up the head, I blamed it on a small head gasket leak. Finally, the bubble became so large that there was no fluid in the line from the expansion tank to the top of the radiator and CHT and coolant temperatures had become unstable. This indicated that vapor bubbles were being pumped through the cooling system. And yet the line from the other side of the expansion tank to the head was full. The coolant had attacked the epoxy and the epoxy had expanded and filled the bleed hole. I disconnected the hose from the tank and re-drilled the hole and the system filled as it should. Flew for about ten minutes and no bubbles appeared in the burp lines, and the coolant and head temperatures remained stable. |
|
|
|
|